Professional facials produce results that most people cannot sustain — not because the techniques are impossibly complex but because they are never explained clearly enough to replicate at home. The average facial appointment costs between 60 and 150 euros, lasts 60 to 90 minutes, and produces improvements in skin texture, clarity, and radiance that fade within two weeks because nothing continues the work between appointments.
The professional esthetician’s approach is not magic. It is a systematic sequence of steps — each targeting a specific skin function — applied consistently. Understanding the sequence and the reasoning behind each step makes it entirely replicable at home with accessible products and minimal equipment.
Here is the complete weekly skin reset ritual built from esthetician technique and evidence-based skincare science.
When to Do It
Once weekly — ideally in the evening when the skin is not about to face UV exposure, pollution, or makeup application. Sunday evening works well as a weekly reset before the working week. Allow 45 to 60 minutes without interruption.
Daily maintenance skincare continues as normal — this ritual layers on top of it rather than replacing it.
Step 1 — Double Cleanse
Professional facials always begin with a thorough double cleanse — removing the accumulated layer of sunscreen, makeup, sebum, pollution, and environmental debris that daily cleansing frequently leaves behind.
First cleanse — oil based: Apply a cleansing oil or oil-based balm cleanser to dry skin. Massage for 60 to 90 seconds in circular upward motions — this emulsifies sebum and dissolves oil-based impurities including sunscreen and makeup that water-based cleansers cannot fully remove. Add water to emulsify and rinse thoroughly.
For the weekly ritual use the oil cleanse as a mini facial massage — spend the full 90 seconds working across forehead, cheeks, nose, and chin with deliberate circular pressure. This stimulates microcirculation and begins the lymphatic drainage component of the ritual.
Second cleanse — gentle water based: Follow with a low-pH gentle cleanser — gel or cream texture depending on skin type — massaged in for 30 seconds and rinsed with lukewarm water. This removes any residue from the oil cleanse and water-soluble impurities.
Pat skin dry with a clean soft cloth. Never rub.
Step 2 — Steam
Professional estheticians use steam machines to open pores, soften keratin plugs, and improve the penetration of subsequent treatment products. At home a steam bowl achieves the same result.
Boil water and pour into a large heat-safe bowl. Add optional additions — a chamomile tea bag for anti-inflammatory benefit, a few drops of tea tree oil for acne-prone skin, or a drop of lavender oil for sensitive skin. Drape a towel over your head and the bowl, creating a tent. Hold your face 30 to 40 centimetres above the water — far enough to avoid discomfort. Steam for five to eight minutes.
The physiological effects are measurable. Steam increases skin temperature which improves microcirculation, softens the material within congested pores making extraction easier, increases skin permeability for subsequent active ingredients by up to 400 percent according to research on transdermal delivery, and provides mild hydration to the surface layers of the epidermis.
Avoid steam if you have rosacea or highly reactive skin — heat triggers vasodilation that can exacerbate redness and flushing in these conditions.
Step 3 — Exfoliation
Post-steam skin is primed for exfoliation — the keratin-softening effect of heat makes both physical and chemical exfoliation more effective and less potentially irritating than on cold dry skin.
Choose one exfoliation method based on skin type and concern — do not combine chemical and physical exfoliation in the same session.
Chemical exfoliation — AHAs for surface renewal: Alpha hydroxy acids — glycolic acid, lactic acid, mandelic acid — dissolve the bonds between dead skin cells and the surface below, accelerating cell turnover and revealing fresher skin underneath. They also stimulate collagen synthesis with consistent use and improve the penetration of subsequent products.
Glycolic acid has the smallest molecular size and deepest penetration — most effective for anti-aging and hyperpigmentation but also most potentially irritating. Lactic acid is gentler with additional humectant properties — better for sensitive and dry skin. Mandelic acid is the gentlest option with the largest molecular size — suitable for reactive and rosacea-prone skin.
Apply a chemical exfoliant at the concentration appropriate for home use — five to ten percent for glycolic, five to twelve percent for lactic — leave for the time specified on the product, and rinse thoroughly. Do not leave on longer than directed — the pH-dependent reaction does not produce better results with extended contact time.
Physical exfoliation — enzyme masks for sensitive skin: Enzyme exfoliants — typically papain from papaya or bromelain from pineapple — digest the protein bonds of dead skin cells without the pH-dependent mechanism of AHAs. They are gentler, suitable for sensitive and reactive skin, and provide effective exfoliation without the irritation risk of acid exfoliants.
Apply as a mask, leave for five to ten minutes, and rinse thoroughly.
Physical scrub — for body not face: Mechanical scrubs with particles — sugar, salt, walnut shell — are not recommended for facial skin. The irregular particle shapes create micro-tears in facial skin even when they feel gentle. Reserve physical scrubs for body use.
Step 4 — Extraction — Optional and With Caveats
Professional estheticians perform manual extraction of blackheads and milia after steam softening. At-home extraction is possible but requires restraint and correct technique — aggressive or incorrect extraction causes more damage than the congestion it is removing.
Only attempt extraction on fully steamed skin where the plug is visibly at the surface. Wrap fingers in clean tissue — never use bare fingernails. Apply gentle even pressure from both sides simultaneously — do not squeeze with nails or dig. If the plug does not release easily with gentle pressure it is not ready for extraction and forcing it will cause inflammation and potential scarring.
A comedone extractor tool — a small metal loop — applies more even pressure than fingers and reduces nail damage risk. Sterilise before use with isopropyl alcohol.
If in doubt skip this step entirely — the exfoliation and masking steps address congestion progressively over weekly rituals without the damage risk of extraction.
Step 5 — Treatment Mask
The mask step is where the ritual delivers its most concentrated active treatment. Choose based on your primary skin concern this week — skin needs vary and the mask can be adjusted accordingly.
For dull congested skin — clay mask: Kaolin or bentonite clay draws excess sebum and debris from pores while providing mild antibacterial activity. Apply a thin even layer to steamed post-exfoliation skin. Leave for eight to ten minutes — remove before the mask fully dries as fully dried clay begins pulling moisture from the skin rather than sebum. Rinse thoroughly with warm water.
For dehydrated or stressed skin — hydrating mask: Sheet masks or wash-off hydrating masks containing hyaluronic acid, aloe vera, ceramides, and niacinamide replenish moisture and support barrier repair. Leave for 15 to 20 minutes. For sheet masks pat the remaining serum into skin rather than rinsing.
For aging or uneven skin — vitamin C mask: Vitamin C in a stabilised formulation applied as a mask delivers antioxidant benefit, inhibits melanin transfer for brightening, and stimulates collagen synthesis. Leave for ten minutes and rinse.
For sensitive or reactive skin — calming mask: Colloidal oatmeal, centella asiatica, green tea extract, or chamomile-based masks reduce inflammation and support barrier repair after exfoliation. Leave for ten to fifteen minutes and rinse gently.
Step 6 — Facial Massage and Gua Sha
Professional facials include manual massage techniques that improve circulation, stimulate lymphatic drainage, relax facial muscle tension, and improve product absorption. This step distinguishes a true skin ritual from a product application routine.
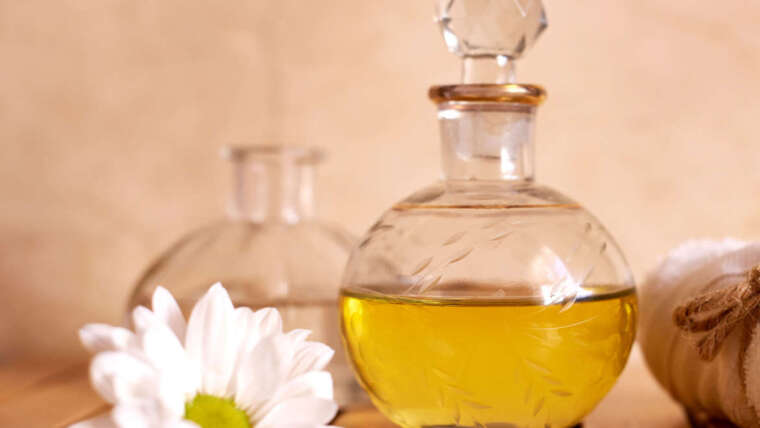
Apply two to three drops of facial oil to clean hands — rosehip oil for anti-aging, jojoba for oily skin, squalane for sensitive skin. Begin with effleurage — gentle sweeping strokes from the centre of the face outward and upward. Work from chin to ear, nose to temple, forehead outward to hairline. Use the lightest possible pressure that still moves the skin.
Follow with gua sha if you have the tool. Use the curved edge against the skin at a flat angle — approximately 15 degrees — with upward and outward strokes. Three to five passes per section. Work from neck upward — the neck is the drainage point for facial lymph and should always be worked first.
The entire massage takes five to eight minutes. The immediate result is visible — improved colour, reduced puffiness, more defined contour. The cumulative result over weeks of consistent practice is improved microcirculation and progressive reduction in chronic facial muscle tension.
Step 7 — Targeted Serum
Post-massage skin has enhanced circulation and improved permeability — the optimal condition for active serum application. Apply your most targeted treatment serum while skin is still warm from massage.
Choose based on primary concern. Vitamin C serum for brightening and antioxidant protection. Retinol or bakuchiol for anti-aging. Niacinamide for pore minimising and oil control. Tranexamic acid or azelaic acid for hyperpigmentation. Peptide serum for firmness and collagen support.
Apply two to three drops to fingertips and press gently into skin rather than rubbing. The pressing motion improves penetration without disrupting the skin surface.
Step 8 — Rich Moisturiser or Overnight Mask
The weekly ritual concludes with a richer moisturiser or overnight sleeping mask than your daily routine uses — taking advantage of the enhanced absorption created by the preceding steps and the overnight repair window.
Overnight sleeping masks — leave-on gel or cream formulations applied as the final step — deliver concentrated active ingredients that work during the skin’s peak repair cycle between 11pm and 4am when cell turnover is highest.
Look for formulations containing ceramides for barrier repair, peptides for collagen support, and humectants including sodium hyaluronate and glycerin for overnight hydration. Apply generously and leave undisturbed.
The DIY Treatment Options
Several effective mask and treatment options can be prepared from accessible ingredients for use in specific steps of this ritual — consistent with the evidence on kitchen skincare ingredients covered in our previous article.
Honey and oat calming mask: Mix two tablespoons of finely ground oats with one tablespoon of raw honey and enough warm water to form a spreadable paste. Apply after exfoliation for ten minutes. Delivers colloidal oatmeal barrier benefits and honey antibacterial properties — suitable for most skin types including sensitive.
Green tea and aloe brightening mask: Steep a strong green tea, allow to cool completely, and mix with an equal amount of pure aloe vera gel. Apply as a sheet or leave-on mask for fifteen minutes. Delivers EGCG antioxidants from green tea and the soothing mucopolysaccharides of aloe — suitable for all skin types, particularly beneficial for redness and post-sun skin.
Turmeric and yogurt brightening mask: Half a teaspoon of turmeric mixed with two tablespoons of plain full-fat yogurt. The lactic acid in yogurt provides mild AHA exfoliation while turmeric delivers curcumin anti-inflammatory benefit. Apply for eight to ten minutes. Note the staining caveat — rinse thoroughly and do not use on very fair skin without patch testing first.
Post-Ritual Care
Avoid active exfoliants — retinol, AHAs, BHAs — in the 24 hours following the ritual. The skin has already been exfoliated and additional actives will cause irritation rather than benefit.
Apply SPF the following morning — freshly exfoliated skin is more photosensitive than normal and adequate UV protection is essential to prevent the hyperpigmentation that exfoliation without sun protection causes.
Drink 500ml of water after the ritual — the steam and mask steps have increased transepidermal water loss and rehydration supports the skin recovery process.
The Results Timeline
After the first ritual: improved radiance, reduced congestion, softer texture. After four weekly rituals: visible improvement in skin evenness, reduced pore appearance, improved hydration. After eight to twelve weekly rituals: meaningful improvement in fine lines, skin tone, and overall skin quality that compounds with continued consistency.
The professional facial produces dramatic immediate results because it combines all these steps in sequence with professional products and technique. The weekly home ritual produces the same results over a longer timeline — at a fraction of the cost and with the compounding benefit of consistency that occasional professional appointments cannot match.
This article is for informational purposes only. Always patch test new products and ingredients before full facial application. Consult a qualified dermatologist for persistent skin concerns.